Nature's Best :: Don Smith Photography
Exploring our incredible world one image at a time!
Working A Composition – Allow Your Scene To Evolve
Posted on November 21, 2013
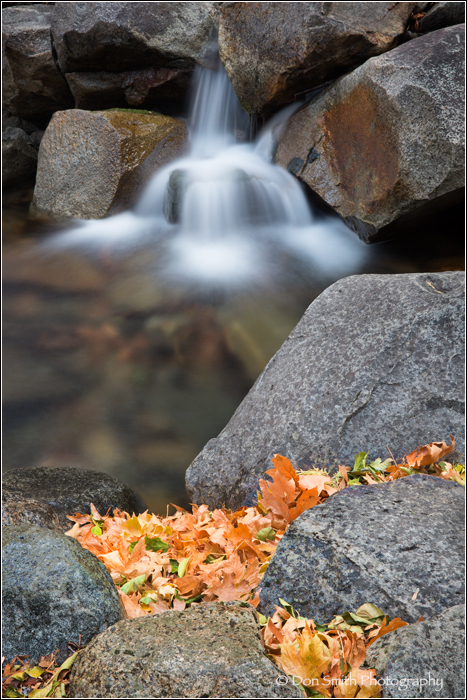
Bridalveil Creek and Fall Color, Yosemite National Park
Canon 5DMKIII, 57mm, f/16, 6 second timed-exposure, 100 ISO, Singh-Ray Slim LB Polarizer
Rarely do I capture a finished landscape image on my first attempt. Like most things in life, crafting a finished composition is a process. Few of us are gifted enough to see a finished image on our first try.
While co-teaching Gary Hart’s recent Yosemite workshop, I listened as Gary told the group that oftentimes his best image is one of the last he captures during a sequence. Pros call this “working the scene.”
The next morning, we took our group to Bridalveil Creek. Three tributaries form at the base of the Bridalveil Fall, but during this time of year, with so little moisture, only one of the tributaries was flowing. Indirect light allowed for controllable contrast (highlights through shadows captured in one click) and students were able to work on compositions and not be overly concerned with exposures.
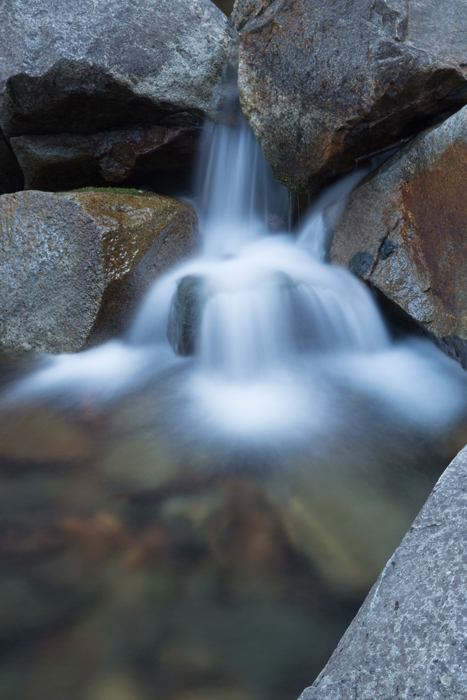
What first drew my attention to this scene was the beautiful flow of the tiny falls. I knew that a long exposure (6 seconds for this image) would create a dreamy and peaceful image. What is natural for me (and perhaps you) is to become too focused on what draws our initial attention. What follows, is a pictorial depiction of how I worked my composition to arrive at my final image. Let’s start with the initial composition of what first drew my eye – the falls. Image #1:
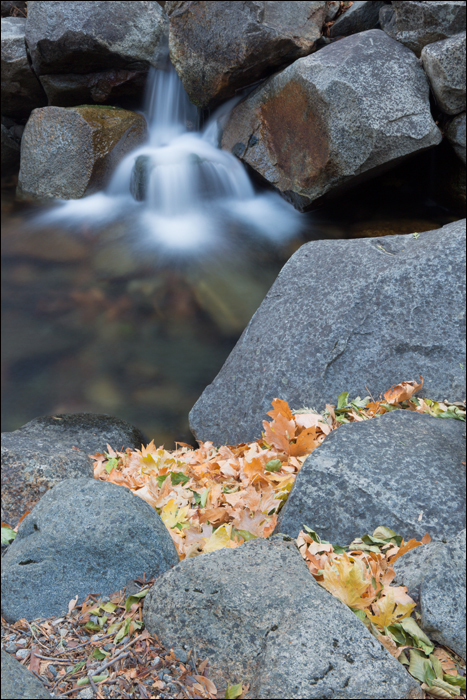
This image on its own did indeed feature the falls, but lacked depth and secondary interest. I also found the foreground rock a bit obtrusive and my limited position did not allow for me to shift far enough to my left to eliminate it. At this point of crafting my scene, I’m always thinking, “is there a possible foreground?” Lesson #1: if you find an interesting background, challenge yourself to find a complimentary foreground; conversely, if you find an interesting foreground, challenge yourself to find a complimentary background (and middle ground). Alright, pretty basic, so let’s move on to my initial attempt at adding a foreground – these beautiful fall leaves. Image #2:
At first I concerned myself with closing the gap between the leading edge of the foreground rocks and the outer edge line of the falls. With my tripod fully extended, I had too much of the dark pool (not very interesting). I paid special attention to not allow the leading edge of the top right boulder to cross into the white outer edge of the fall. This would have merged the two shapes in the image’s 2-dimesional realm and served to reduce depth (be careful where lines merge).
Oftentimes I find it more productive to take my camera off the tripod and move around until I overcome a particular problem. For this scene, it was eliminating some of the real estate I gave to the pool. Once I found what worked, I brought the tripod back in to match my new perspective. OK, the scene is now getting more interesting – CLICK – ANALYZE.
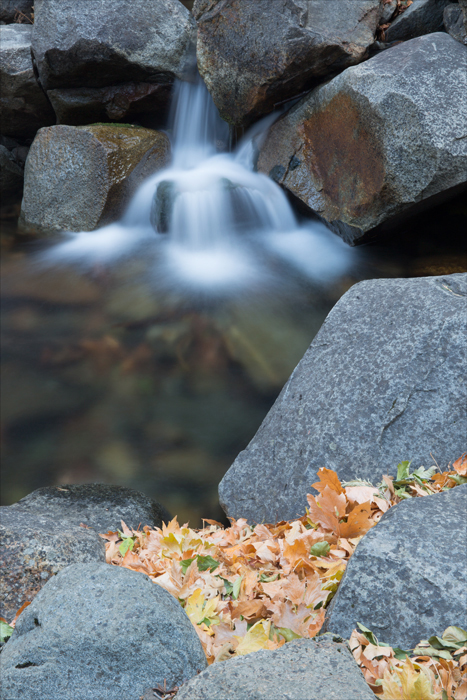
I like using my LCD to study the image. I try to slow down and ask myself how I can improve on the composition. What I did not see were the annoying sticks and pebbles in the lower left of the image (my eye was focused on the leaves in the center and I missed it). Recompose to get that portion of the scene eliminated – CLICK- ANALYZE.
A tighter crop did the trick of eliminating the clutter. Now the eye is free to move from the falls (my focal point) to the colorful leaves. The eye will fall on the falls (pardon the pun) because it is naturally drawn to the brightest part of the scene. Every image also contains a nodal point (an area where the eye moves out into the remainder of the scene). Remember, I want the viewer’s eye to flow out from the falls to the leaves thus connecting the two key elements of the composition.
It’s important that we are aware of where the nodal point is located (I like think of this as a hinge – a balance point in the image). For this image, it is the base of the falls. This is where the eye is free to move out and explore the lower potion of the composition. I should note that sometimes the focal point and nodal point are one in the same. Leonardo da Vinci’s Last Supper is a perfect example where Christ’s head (tilted towards the left), is both the focal point and the nodal point (pushing the viewer’s attention to the right side of the painting as they view it).
Back to my image. Again I began the process of analyzing my scene. I did not spot my final foreground composition at first, but then it caught my attention. I tried not to look at the leaves literally; instead, I looked at them collectively as a shape. Once I switched into this mode of thinking, I spotted this final image where I felt the shape of the leaves (as a whole) mimicked the shape of the falls: CLICK!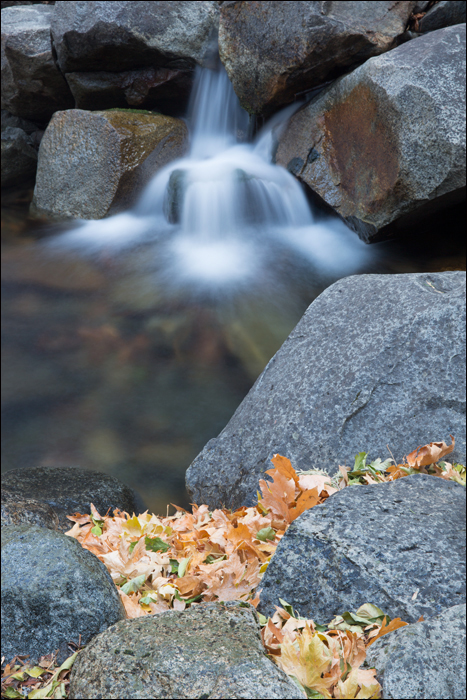
Keen observers may recognize the the foreground rocks are now wet. Yes, I allowed myself a bit of artistic license and splashed some water on the rocks (to darken them down). I thought about burning them down in post-processing, but opted for a more natural darkening by splashing water on them. Viola’ – lighter tones are now darker tones. Remember, you can move your viewer’s eye just by controlling the tonality of the image. In final processing, I added a burn layer and darkened them down a bit more.
If you would like to learn more about my workflow methods (both visual and post-processing), please consider signing up for one of my workshops or a private workshop (that I can design directly for you specific needs).
2014 Photo Workshops – Complete List
5th Annual Kauai Workshop – Garden Isle and Tropical Paradise – June 20-24, 2014 (3 spots remaining)
Software Discounts
Photomatix Pro 4.2 type in code at checkout: donsmithphotography 15% discount
Topaz Software type in code at checkout: SMITHPHOTO 10% discount
Helicon Focus click on link to receive 15% discount
Hardware Discounts
Special Year End “Black Friday” Offer From Think Tank Photo NOTE: (Use Promo Code WS-643)
Category: Landscape Photography Tagged: Bridalveil Creek, California, composition, depth, elements, flow, tips, Yosemite National Park
Recent Posts
- Why I Will Never Fly American Airlines Again :: At Least Not After Next Tuesday…
- New Blog Site For Don Smith Photography!
- Do You Look Or Do You See? Developing Your Creative Vision :: Part 2 of 3
- Do You Look Or Do You See? Start With 10,000 Hours Of Practice :: Part 1 of 3
- Photographing Wildflowers In The Wind At Big Sur’s Garrapata State Park
